Turning the knobs
This will increase the gain of the microphones. The microphones will become more sensitive to sound.
This will decrease the gain of the microphone. The microphones will become less sensitive to sound.
This section will go over all the audio components. You’ll learn what they do, how to connect them and how to troubleshoot them.
The microphone you’ll be using is the Shure MX 393/O. This captures audio around it and it’s great for a meeting room. This should be placed on high flat surface like a desk.
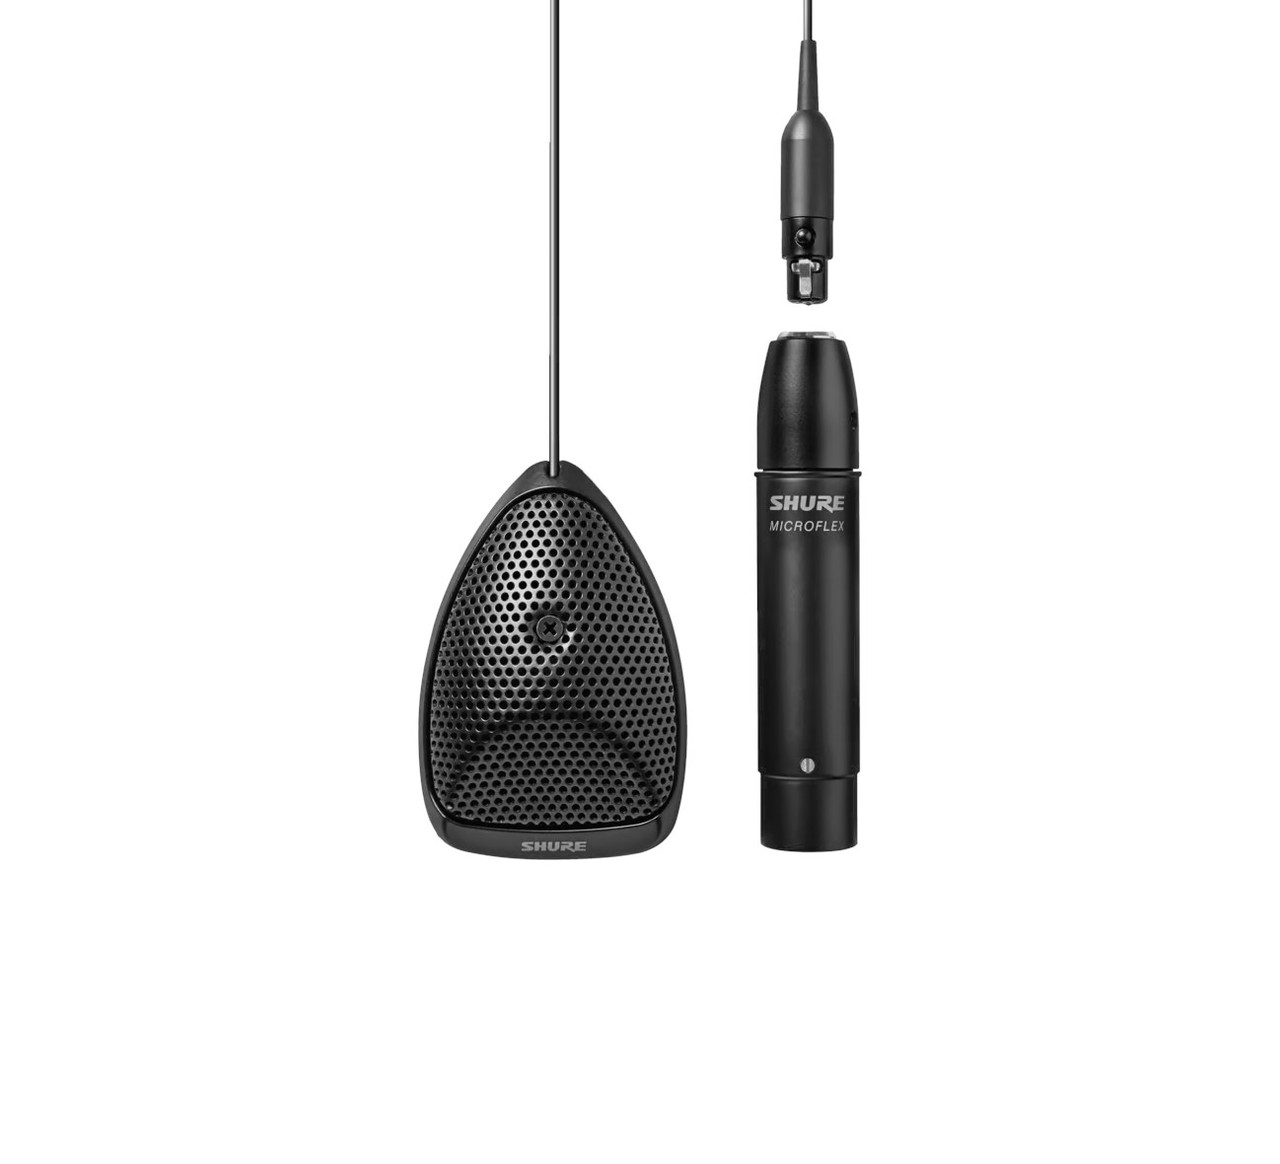
As you can see this microphone has two parts, the microphone itself and an XLR adapter that we will talk about latter on.
This microphone has an omnidirectional polar pattern, meaning it can capture audio around them, the audio decreases in quality the further you are from them.
Here’s an illustration on different polar pattern used for microphones

As you can see the Omni-directional pattern covers an area around the microphone.
A great position for this microphone is a table. Position the microphones were the most conversational interaction happens making sure the two microphones are at least 6ft apart for optimal audio capture.
The interface you will be using is the Focusrite Scarlett 2i2 (4th gen). This component will transform the analog signature of the microphones into a digital input for the computer.

This component looks complex but after knowing what all the parts mean, it will be self-explanatory.
We will split the functionality into two parts
The front of this audio interface has the most population of buttons and knobs, but we’ll walk through what they mean and how they work.
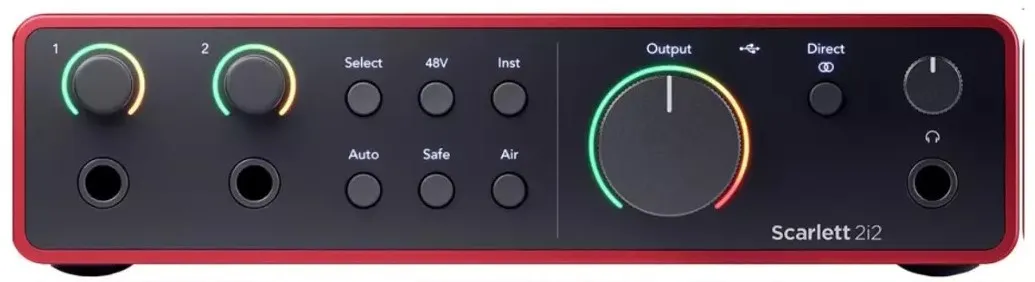
Let’s focus in the left side first.
You’ll see two knobs on the left with an RGB (Red Green Blue) light ring around them. These control the gain of the microphones.
Turning the knobs
This will increase the gain of the microphones. The microphones will become more sensitive to sound.
This will decrease the gain of the microphone. The microphones will become less sensitive to sound.
The RGB ring will change colors from green white to red. These colors have meaning and need to be managed constantly if your
RGB Ring Color
Little to no audio is being picked up. Increase the microphone gain to fix this.
The is the color you want to be recording, this will ensure your recording is at the best quality and volume.
The audio is getting to close to be distorted. Lower the gain just a bit to get back to the green light.
Their are 6 buttons on the left side, the important ones is 48V and Safe. These should be on at all times.
Here’s a table of what all the buttons do.
| Button | Description |
|---|---|
| Select | Move the selection to the next preamp. The other buttons change to control the input you select. The currently selected channel’s number lights green. |
| 48V | 48V phantom power at the XLR mic input to power condenser microphones. When 48V is on, the Scarlett 2i2 applies 48V phantom power to both inputs. |
| Inst | Toggle the selected 6.35mm (1/4”) input between Line or Instrument level. |
| Auto | Start the Auto Gain feature |
| Safe | Turn on the Clip Safe feature for your input |
| Air | Turn on AIR mode |
You are not goin to use this part. This is for monitoring the audio, but you will be using OBS monitoring since you’re going to clean the audio a bit before it goes to recording or Zoom.
There’s only three things you need to get familiar with:
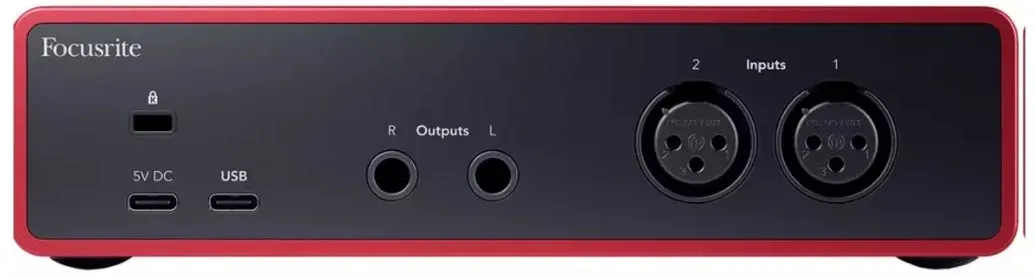
| Input | Function |
|---|---|
| Input 1 | XLR input 1 |
| Input 2 | XLR Input 2 |
| USB | USB type C port that will transfer audio to the computer and deliver power to the audio interface |
Now let’s talk about Video.