Stop and Pause
This will pause the recording and will finish the video encoding.
This will pause the recording until you press the pause button again.
OBS is a free to use opensource software that you’ll use to record audio and video.
![]()
OBS can be used for lot’s of things and therefore there’s a broad selection of inputs and outputs but we are only goin to go over the one’s we’ll use.
The first time you open OBS you’ll maybe see a profile already loaded with scenes and sources. If you want with a fresh profile and scene collection follow this steps.
A Profile are preset settings that will change the way OBS works.
For our case, we want it to be setup for recording by doing the following
Click on the Profile tab
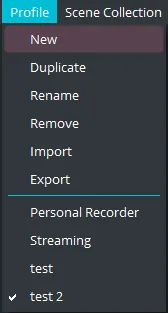
Select New
Give your profile a name and click the OK button
Select the option Optimize for recording, I will not be streaming
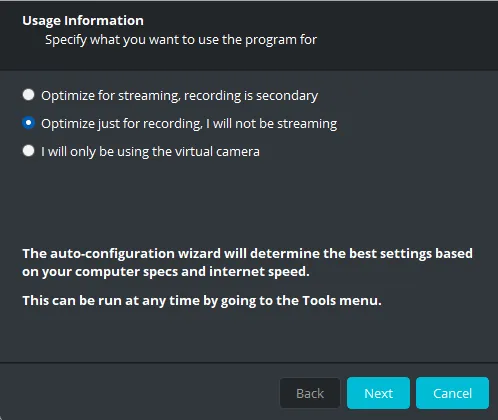
Click the Next button
Choose your desired resolution and FPS
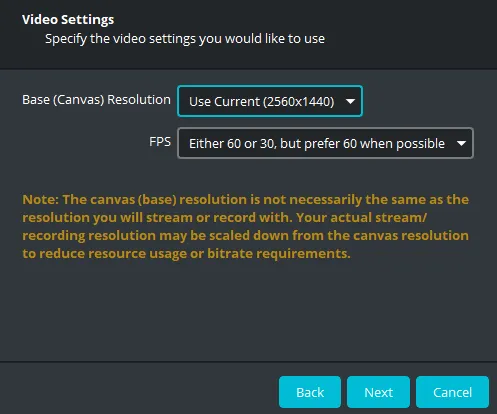
Click the Next button
Double check you settings, if everything looks good select Apply Settings
A Scene Collection is all the scenes, video inputs, audio inputs, etc.
If you already have one that works for you use it.
If you want to start with a clean slate do the following
Click the Scene Collection tab
Select the New option
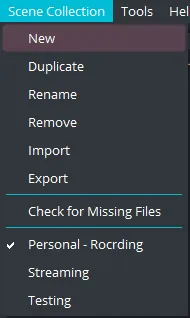
Give your Scene Collection a name
Click the OK button
Now you’ll see a clean OBS Scene Collection without any inputs and a default Scene in the Scenes section in the bottom left side of the window.
Think of scenes as like a canvas where you can drop all of you inputs like video, audio, overlays, etc.
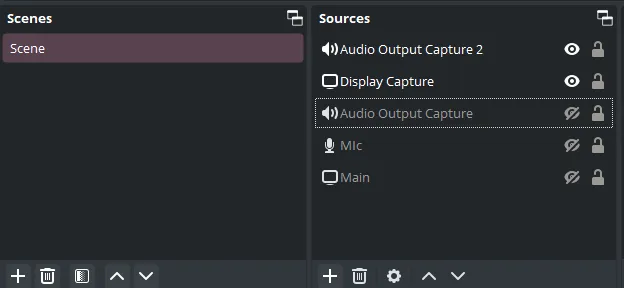
A scene contains a collection of sources.
This includes their position in the screen, size, audio inputs, muted inputs, etc.
A source is an input like a screen capture, camera, HTML overlay, microphone, etc.
We are goin to cover only two sources
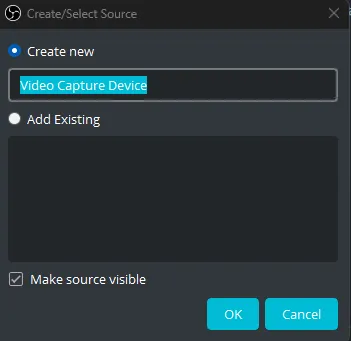
When you want to add a camera you need to select the Video Capture Device in the source section.
Here’s how to add a camera source in OBS
Locate the Source section in the bottom left side of OBS window
Click on the + button in the bottom left

Select Video Capture Device
Give your source a name and click the OK button
You’ll see a new window pop-up with lots of options
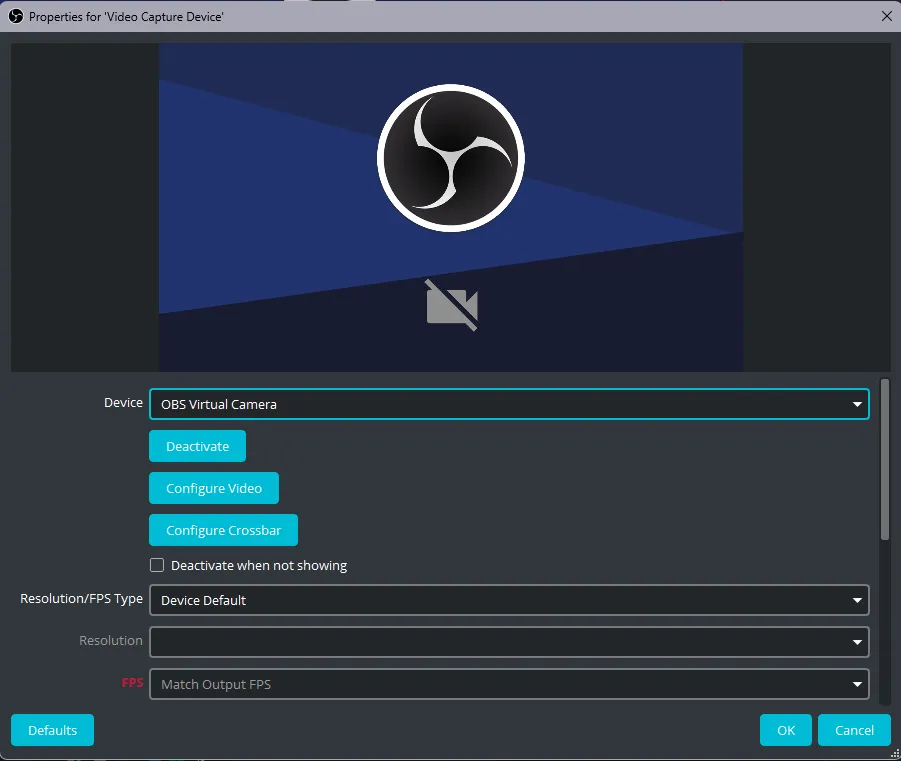
In the Device section, choose the camera you want to add
In the Resolution/FPS Type section, choose Custom
In the Resolution section, choose the resolution of the camera you are adding
Click the OK button
You will now see your new camera source in the source section and the preview window
When you want to add a microphone input you need to select the Audio Input Capture in the source section.
Here’s how to add a microphone input in OBS
Locate the Source section in the bottom left side of OBS window
Click on the + button in the bottom left
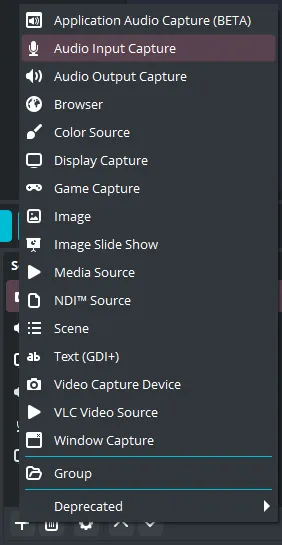
Select Audio Input Capture
Give your source a name and click the OK button
In the Device section choose the audio interface or microphone you want to add
Click the OK button
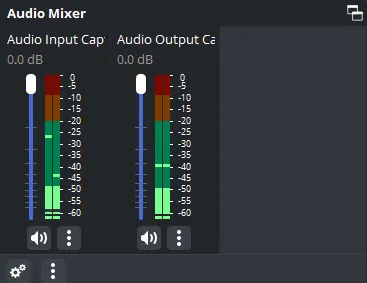
you will now see your new audio source in the Audio Mixer and Source sections
There are additional steps you need to make since your audio interface might be in stereo mode.
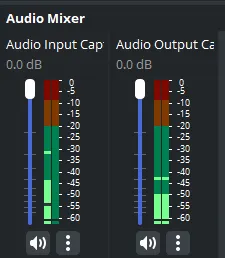
You can in the screenshot that the left audio input has only one green bar (left) and the right one both.
Here’s how to get both
In the Audio Mixer section, right click the audio input you want to fix
Click Advanced Audio Properties
Locate your audio input and check the box in the Mono column
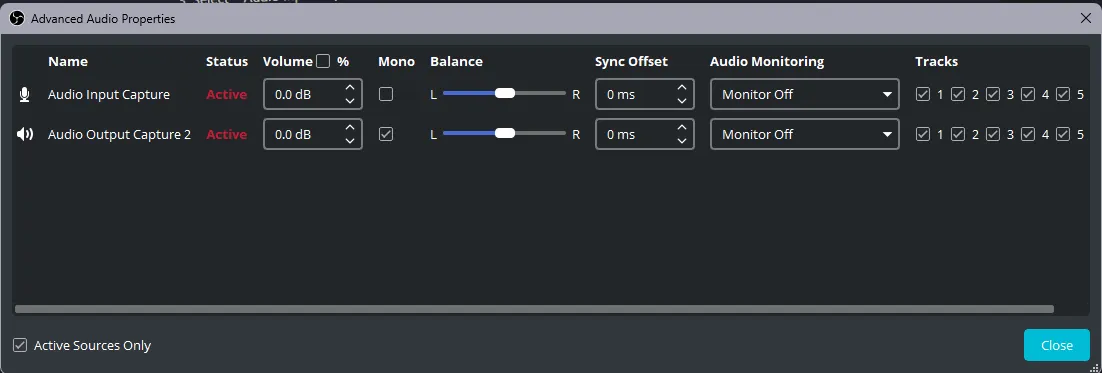
Click on the Close button
Now both channel will be filled
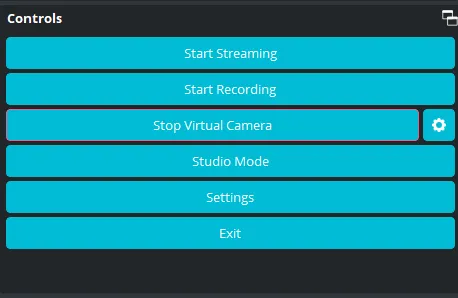
We will focus in the Control section that you can fin in the bottom right of the OBS window.

We only need to focus in two buttons
This button will start a recording of all the sources in the selected scene.
After clicking this button, the button’s text will changer to Stop Recording and a pause button will appear in the right.
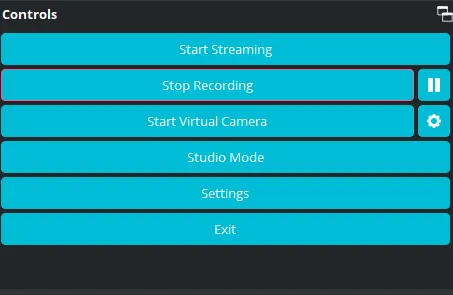
These are self describing, but here’s the actions of these buttons just in case.
Stop and Pause
This will pause the recording and will finish the video encoding.
This will pause the recording until you press the pause button again.
By default your recording are going into the Videos folder in your computer.
There’s different outputs the video encoder will let you choose from. By default the format of the video will be mkv.
Here’s some benefits of using mkv vs mp4
| MKV | MP4 | |
|---|---|---|
| File size | Larger files due to lossless compression | Smaller files due to efficient compression |
| Compatibility | Supports many codecs, but some devices may not support MKV natively | More widely compatible with most devices |
| Video quality | Higher quality due to lossless compression | Lower quality than MKV due to compression |
| Features | Supports multiple audio and subtitle tracks, chapters, and tags | Supports fewer tracks and basic metadata |
| Error resilience | Can recover from file corruption and play partial content | Often makes the entire video unplayable if corrupted |
The most important feature is the Error resilience. If for some reason OBS or the computer crashes, the video format will be playable and readable up to the point where the app crashed.
This button will allow you to share your current OBS scene by creating a Virtual Camera that you can choose in Zoom, Teams, etc.
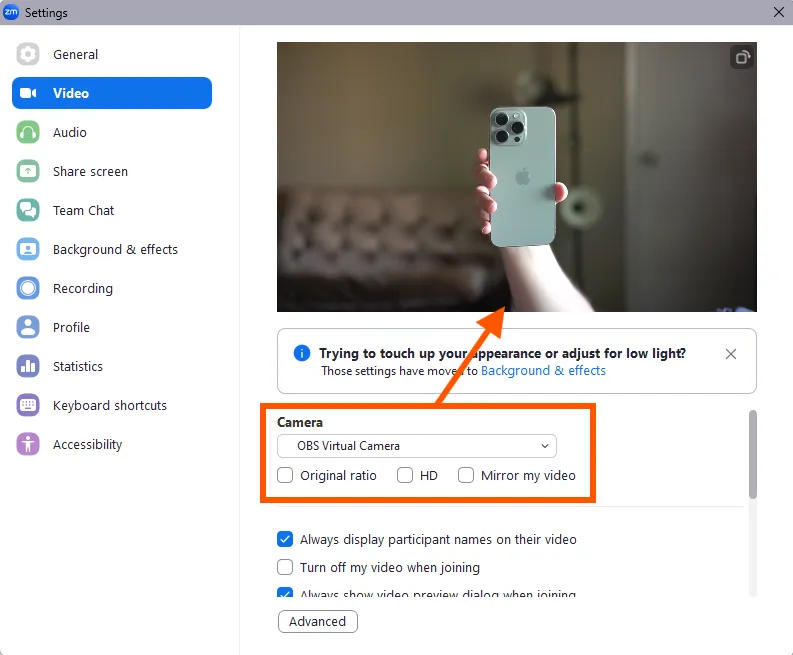
After clicking this button, the button’s text will change to Stop Virtual Camera. Press this button to stop sharing your OBS feed.
Plugins are a great way to enhance the functionality of OBS. You can find a bunch of them made by the community here:
By default OBS cannot record or stream separate sources and scenes at the same time. We can add this functionality by using a plugin called Branch Output
Branch Output PLugin
This plugin allows you to can record each source individually. As a result, depending on the number of sources you wnat to record, this plugin will produced a video file per source.